Winter Skills: How to Choose and Care for Your Outer Shell Jacket | Gore-Tex & Mountaineering Tips

Learn how to choose the right outer shell jacket for winter skills and mountaineering. Discover key Gore-Tex Pro features, layering advice, hood design tips, and reproofing care to stay warm, dry, and safe in harsh mountain conditions.
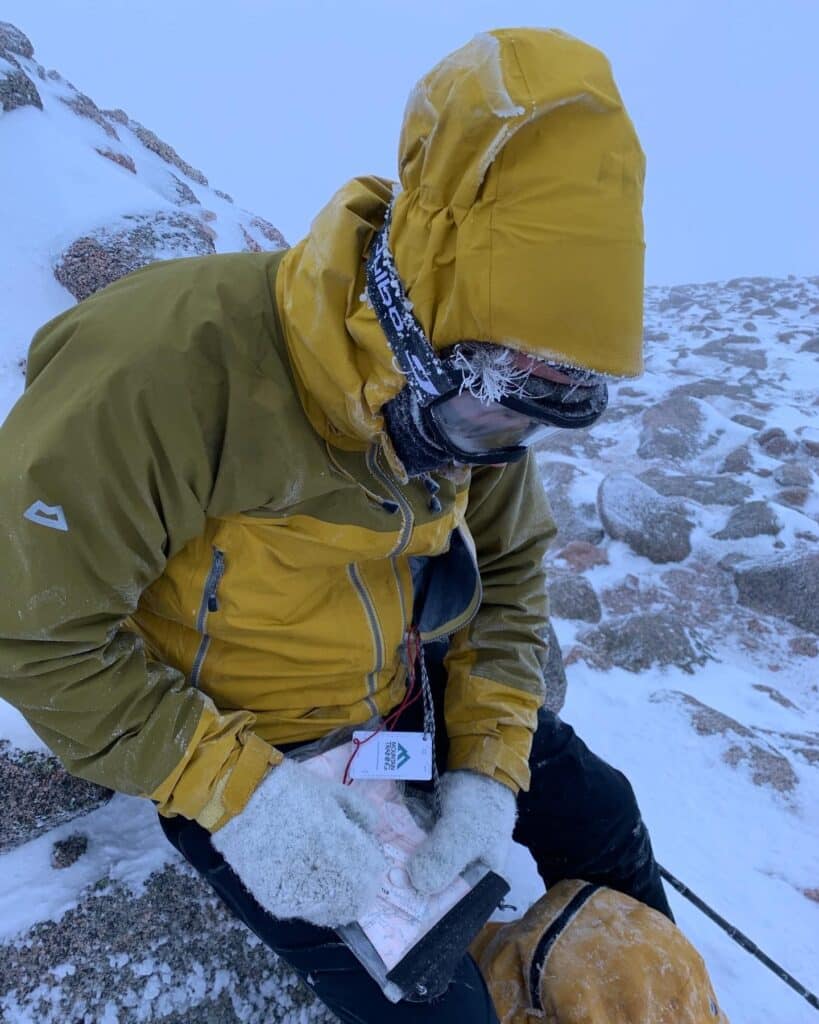
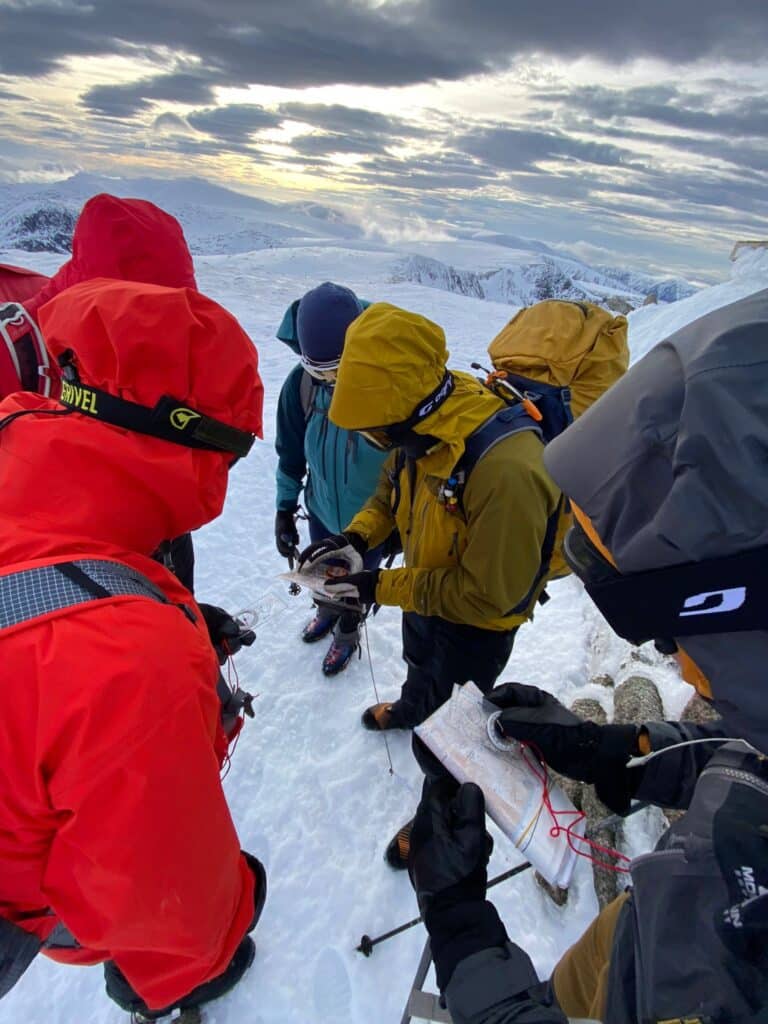
When the wind howls, the snow drives, and the temperature drops below zero, your outer shell jacket becomes your first and most important line of defence against the elements.

Whether you’re learning winter skills, heading out for a mountain day in Scotland, or tackling alpine routes, understanding what makes a good shell — and how to look after it — can be the difference between comfort and crisis.

Here’s how to get it right.


🏔️ 1. Choose a Winter-Grade Waterproof Fabric

For true winter performance, look for a durable, waterproof, and breathable fabric designed for extreme conditions.

Gore-Tex Pro, eVent, or similar membranes are the gold standard. They’re tough enough to withstand abrasion from rocks, ice, and pack straps while still allowing moisture to escape from within.

💡 Pro tip: Avoid lightweight “summer shells” for winter use. They’re fine for rain showers but can quickly fail under sustained snow, wind, and pack pressure.


🧗‍♂️ 2. The Hood: Your Built-In Shelter

A well-designed technical hood is essential in winter. Look for:

  • A large volume that fits over helmets and multiple hats.
  • Full adjustability, allowing you to cinch it tight in storm conditions.
  • A stiffened or wired visor to keep snow and rain off your face and maintain visibility in driving weather.

A good hood can turn a “battle through the storm” into a manageable climb.


🧤 3. Sleeves and Cuffs That Work with Gloves

You’ll be wearing big insulated gloves or mitts, so wide, easy-to-adjust cuffs are a must. Make sure they seal well with your gloves — some prefer tucking gloves inside the sleeve, others over it. Test both methods before committing to a jacket.

Adjustable Velcro or hook-and-loop cuffs give flexibility, keeping snow and drafts out when you’re reaching, climbing, or using poles.


🎒 4. Pockets and Storage for the Mountains

In winter, convenience equals safety. You’ll often need quick access to essentials like a map, compass, GPS, or snacks without removing your pack or harness.

Look for jackets with:

  • High chest pockets clear of hip belts and harnesses.
  • Large, insulated hand pockets for warmth and storage.
  • Internal mesh pockets for gloves or keeping electronics from freezing.

Add cord pulls or zip loops so you can open pockets easily with gloves on — or tie in small essentials to prevent losing them in deep snow or wind.


🌬️ 5. Ventilation: Managing Heat and Sweat

Even in sub-zero temperatures, you’ll generate heat while climbing or walking uphill. A good jacket includes pit zips, side vents, or mesh-lined pockets that double as vents.

Learning to manage your microclimate is a key winter skill — it prevents overheating, chills, and condensation build-up inside your layers.


🧼 6. Caring for Your Outer Shell

Your jacket’s performance depends as much on maintenance as on materials. Here’s how to make it last:

  • Dry it naturally — never on direct heat sources like radiators or fires.
  • Clean it regularly with a specialist technical wash (not household detergent).
  • Reproof periodically using a spray-on or wash-in DWR (durable water repellent) to restore water beading and breathability.

A clean, reproofed jacket breathes better and stays waterproof longer.


🧭 7. Putting It All Together

A great outer shell isn’t just a raincoat — it’s a piece of technical safety equipment. It protects your insulation layers, regulates your body temperature, and keeps you functional when the weather turns.

Invest time in learning how to use and maintain it properly. Combine it with effective layering, good route planning, and constant weather awareness, and you’ll be far better equipped for winter mountain days.


💬 Join the Conversation

Everyone develops their own preferences when it comes to winter kit. What’s your go-to jacket or must-have feature?
Share your outer shell tips and mountain-tested experiences in the comments below — we’d love to hear from you!

Understanding Crampons: Types C1, C2, and C3 Explained

As winter approaches and the mountains start to freeze, it’s time to think about your winter gear — and nothing is more essential for safety and performance than a reliable pair of crampons. Whether you’re planning a simple winter hike, a mountaineering trip, or tackling steep ice routes, choosing the right crampon makes all the difference.

In this guide, we’ll explain the three main types of crampons — C1, C2, and C3 — plus share our favorite models for winter adventures.


🧊 What Are Crampons?

Crampons are metal traction devices that attach to your boots, providing grip on snow and ice. They come in different designs and stiffness levels to suit various types of terrain and boots. Understanding the crampon grading system (C1–C3) and how it relates to your boot grade (B1–B3) is key to choosing the right setup.


🥾 C1 Crampons – Flexible and Versatile

Best for: Winter walking, glacier travel, and general mountaineering
Compatible boots: B1, B2, and B3

C1 crampons are the most flexible and beginner-friendly option. They’re designed to fit B1 boots, which don’t have special crampon welts. These crampons attach using tethered straps through plastic toe and heel baskets, making them easy to fit on most sturdy 3/4 season hiking or mountaineering boots.

They usually have 10–12 non-aggressive points, giving reliable grip without being too rigid. The flexibility makes them ideal for long days of winter walking or glacier trekking where comfort and movement matter most. They also fit B1 & B2 boots


🧗‍♂️ C2 Crampons – Rigid and Ready for Steeper Ground

Best for: Mountaineering, alpine routes, and moderate climbing
Compatible boots: B2 and B3

C2 crampons are a step up in performance and stiffness. The front of the crampon may have baskets or hybrid tethers to fit different boot shapes, while the rear features a clip or lever system that locks onto the boot’s heel welt (found on B2 and B3 boots).

With 12 points, including front points for steep or mixed terrain, C2 crampons are great for more technical routes. They’re stiffer than C1 models, giving better precision on steeper ground and improving edging performance on icy rock.

Pair them with a B2 boot for the perfect balance of warmth, stiffness, and flexibility. They also fit B1 & B3 boots


🧩 C3 Crampons – Technical and Precise

Best for: Technical ice climbing, mixed routes, and high-altitude expeditions


Compatible boots: B3 only

C3 crampons are the most specialized and rigid type. They attach securely at both ends with a toe bail and heel clip, locking into the front and rear welts of a B3 boot. This creates a super-stable platform ideal for precision placements on vertical ice and mixed terrain.

C3 crampons typically feature 12–14 aggressive points, including serrated front and secondary points for maximum bite on steep, frozen surfaces. If you’re climbing technical routes or heading to higher altitudes, these are the tools you want underfoot.


⚙️ Other Crampon Variations

Beyond the main C1–C3 range, there are several specialized designs to suit different winter sports:

  • Microspikes: Lightweight traction for icy trails and running.
  • Fell running crampons: Designed for speed and flexibility.
  • Ski crampons: Attach to touring bindings for better grip on ascents.

Each has a niche purpose — so choose based on your activity and conditions.


🔧 Our Favourite Crampons for Winter Adventures

Over the years, we’ve tested a lot of gear. Here are two of our go-to picks for reliable performance and durability:

  • 🟡 Grivel G12 – A true classic. Perfect for general winter mountaineering and climbing up to Grade IV. Sturdy, versatile, and easy to maintain.
  • 🟠 Petzl Darts – Lightweight and aggressive, these are our top choice for technical ice and mixed climbing.

🏔️ Final Thoughts: Choose the Right Crampon for Your Boot and Adventure

Matching the right crampon type to your boot grade is the key to both performance and safety in winter conditions.

  • If you’re mainly hiking or walking in winter, go for C1 crampons.
  • For steeper alpine routes, C2 is the sweet spot.
  • For technical climbing or frozen waterfalls, C3 is your best bet.

Before heading into the mountains, double-check the boot–crampon compatibility, ensure a snug fit, and practice fitting them at home. Once dialed in, you’ll be ready to move confidently and safely through winter terrain